

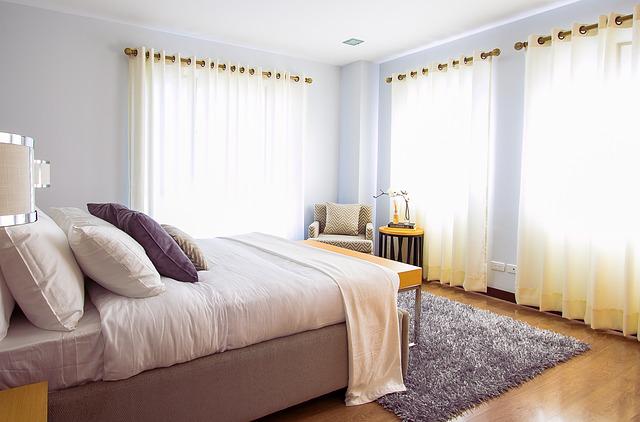
Floating bed frames are popular and can be expensive.
This article will show how to make your frame with LED lighting for a fraction of the cost.
Most people have heard of floating bed frames but don’t know what they are. A floating bed frame is a platform that holds a mattress and box spring above the floor. This can be done using brackets or metal rails that fit between the wall and the bed frame.
There are different reasons why someone might want a floating bed frame. One reason is that it can make the room look bigger because less furniture takes up space on the floor. Another reason is that it can be more comfortable because it allows air to circulate through the mattress, which can help keep it cool.
The downside to a floating bed frame is that it can be expensive. The cheapest ones cost around $200, but some models cost over $1,000.
Materials:
Materials used in a floating bed frame are important to the overall comfort and support of the bed. In addition, the materials used can also affect the lightness or heaviness of the bed.
One common material used in floating beds is wood. Wood is a natural material often chosen for its sturdy and lightweight ability. It is also a relatively affordable option.
Another popular material for floating beds is metal. Metal frames are often seen as more durable than those made from other materials, but they can also be heavier. This may not be an issue if the bed is situated in one spot, but it can be considered if the mattress is moved around frequently.
Cut Wood To Length
When cutting wood to length, there are a few things you need to take into account.
The first is to ensure that the wood is properly supported while cutting.
This can be done using a saw horse or clamping the wood to a workbench.
The second is to ensure you use the right saw for the job.
A handsaw should be used for smaller pieces of wood, while a power saw should be used for larger amounts.
The last thing to remember is always to measure twice and cut once.
Assemble Top Bottom Frame Exterior
When assembling your floating bed frame, you first want to attach the exterior side rails to the top and bottom boards. Next, use a screwdriver or drill to attach each rail using two screws on either end. Make sure the panels are parallel and the screws are evenly spaced.
Next, you will want to attach the exterior side trim. This can be done using a staple gun or nails. If you use pins, ensure they are long enough to go through the edge and into the board below. You may also want to use wood glue before nailing for extra stability. The frame should be evenly spaced along the length of both boards.
Measure Placement For Horizontal Braces
When a floating bed is used in a room, the horizontal braces that hold the mattress must be placed correctly. If they are not set correctly, the bed will not be stable and could fall. The placement of the braces also affects how much light comes into the room. Therefore, the position of the braces should be chosen so that they do not block any windows or doorways.
Install Horizontal Braces
Horizontal braces are installed in a concrete foundation to provide lateral stability and prevent the spread of cracks. Horizontal braces are typically made of steel and are either prefabricated or custom fabricated on site.
Installation of horizontal braces is critical in constructing a floating bed with lights. The braces will provide the necessary stability to keep the bed from moving or swaying and will also help to prevent cracks in the foundation from spreading.
Install Vertical Braces
The installation of vertical braces will be discussed in this article. Vertical braces are a great way to support your home’s walls and can help prevent them from bowing. The first step is to measure the space where you want the brace to be installed. You will then need to purchase a brace that is the right size. Next, you will need to drill holes into the wall where the brace will be installed. The holes should be big enough for the screws that come with the brace to fit through. Once the holes are drilled, you can insert the screws and attach the brace to the wall. Make sure that it is level before you tighten the screws. If necessary, use a leveler or shims to adjust until it is level.
Attach Portion Of Frame and Bottom Portion
You may want to consider adding some luxury to your home in an easy and affordable way. Consider building yourself a floating bed frame with LED lighting. These plans are simple to follow and will require only a few supplies, including a sturdy bed frame, some wire hangers, and some LEDs. Once you have all the materials assembled, you can start wiring the LEDs into the frame in any way that suits your style. For example, you can choose to have them shine brightly from all over the bed or cluster them together in specific areas, like the headboard or footboard.
Install Decorative Pieces
Installing a floating bed with lights is the perfect way to add a touch of luxury and sophistication to any bedroom. The bed can be installed in any room and is ideal for small spaces. The floating bed frame is made from high-quality wood, and the lighted headboard makes the bed look stunning. In addition, the lights can be turned on and off, creating a warm and inviting atmosphere.
Sand Floating Bed Frame
Your typical metal bed frame can be painful to move around and clean. Not only does this new sand floating bed frame solve those problems, but it also looks great in any room! The natural color of the wood and the white sand complement each other perfectly, and the frame is easy to assemble.
Stain Floating Bed Frame
Another great way to add color and life to your bedroom is by using a floating bed frame. Not only does it make your bed the focal point of the room, but it also gives you a lot of extra storage space. The best part is that they’re really easy to make and don’t require special tools or skills.
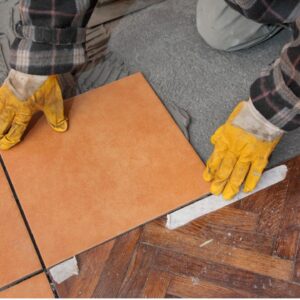
Cut Particle Board
Particle board is a composite material made of small pieces of wood or other materials, held together with a resin or other adhesive. It is used for furniture, flooring, and other applications.
There are several ways to cut particle boards. One way is to use a circular saw with a fine-tooth blade. Another way is to use a straightedge and a utility knife. Particle boards can also be cut with a band saw or jigsaw.
When cutting particle boards, always wear safety goggles and a dust mask. Be careful not to cut yourself, and avoid breathing in the dust from the saw blade.
Cutting particle boards can be tricky, so take your time and be careful. Practice on some scrap pieces before cutting your project pieces.
Install Particle Board
Particle boards are a great material for making furniture. It is strong and inexpensive, and it can be easily cut and shaped. Installation is simple, too – all you need is a saw and some wood glue. This article will show you how to install a particle board bed frame.
First, measure your bed frame size and cut the particle board to size. You will also need to cut four legs from another piece of particle board. Glue the legs to the corners of the bed frame, then let the glue dry overnight.
Once the glue has dried, you can attach the headboard and footboard by drilling pilot holes and using screws. Finally, sand down any rough edges and apply a coat of sealant or paint to protect the surface of your new bed frame.
Install LED Lights
LEDs, or light emitting diodes, are a type of energy-efficient light bulb becoming more popular each year. They last longer than traditional incandescent light bulbs and use less energy, making them a great choice for home and business owners. This article will discuss the basics of LED lights, including what they are, how they work, and some of the benefits of using them. We will also provide tips on installing LED lights in your home or business.
Conclusion
This floating bed frame is a great option for anyone looking for an interesting and unique way to update their bedroom. The LED lighting is a great touch, and the frame is sturdy and well-made. Thanks for reading!


Commented Posts