
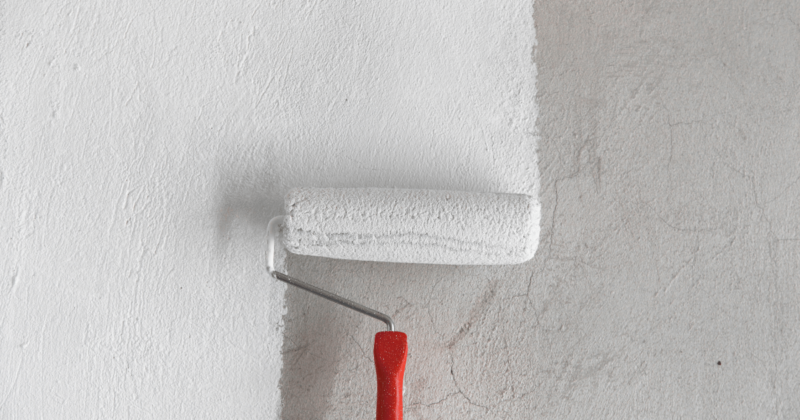
Are you planning on giving your walls a fresh coat of paint? Great! A new paint job can brighten up a space. But before you start painting, you’ll need to ensure your walls are clean. In this blog post, we’ll share a few tips on how to clean walls before painting.
Cleaning walls before painting is important in ensuring a smooth, uninterrupted paint job. Here are five tips to help you clean walls:
- Start by removing any dust or debris with a vacuum cleaner.
- Use a broom to loosen any stuck-on paint or dirt.
- Apply a mild detergent and scrub with a brush.
- Rinse off the area with cold water and dry off with a towel.
What is the best method to wash the walls before painting?
There is no definitive answer to this question, as the best method for washing the walls before painting can vary depending on the paint used, the home’s climate, and other factors. However, some general tips on how to wash the walls before painting include using mild soap with lukewarm water and rinsing thoroughly, using a high-pressure hose, or using a scrub brush and a bucket of water.
How to clean walls: A step-by-step guide
Walls can be daunting to clean, but with a little effort, they can be sparkling clean. This step-by-step guide will show you how to clean walls using easy and effective methods.
Start by spraying a good amount of household detergent on the surface you want to clean. Then, work the detergent into the dirt and stains with your hands or a cloth.
Allow the detergent to work its magic for a few minutes, then rinse off the surface with cold water. Be sure to scrub hard enough to remove all traces of dirt and stain.
Once the wall is clean, apply a coat of drywall compound or stucco sealant to protect it from future damage. Let the sealant dry completely before painting or decorating your walls.
Preparing the walls
The most important part of preparing your walls for painting is to clean them. That will help improve the paint job and make your home look neater. Here are eight steps on how to clean walls:
This guide will include tips on how to clean walls with water, soap, and a scrub brush.
Water:
- Fill a bucket or large sink with enough water to cover the wall in question.
- Add enough soap to make a frothy mixture, then pour it over the wall.
- Use a scrub brush to work the suds into the cracks and crevices of the wall.
- Get into any small nooks and crannies.
Cleaning with water can be done quickly and easily, but be sure not to let the water run down the wall; merely wetting it will do.
What are safe chemicals to use when cleaning walls for painting?
When cleaning walls for painting, there are a few safe chemicals. Below are a few examples:
-Hydrogen peroxide: This chemical is a good option for removing mildew and other organic build-ups on walls. You can also use it to clean surfaces that have been painted previously.
-Baking soda: This agent can be used to remove oil and grease from surfaces. It is also effective at cleaning baked-on paint residue.
-Lysol: This cleaner brand is well known for its ability to kill germs and remove odors. You can use it on virtually any surface, including painted walls.
Cleaning the walls
When painting the walls, it is important first to clean the surface. You can do that with a mild detergent and water mixture or a cleaner specifically designed for painting walls. Make sure to work the cleaning solution into all crevices and around any holes or seams in the wall. After cleaning, it is important to prepare the surface by sanding it if needed. Next, apply the desired paint using a brush or roller. Be sure to wait at least 24 hours after applying paint before touching any wall part.
What to use: Washing soda, water, and a bucket
Are you looking for an easy way to clean your walls before painting? First, try using washing soda, water, and a bucket! Then, follow these simple steps to get the job done:
Prep the surface: Wipe down any dust or dirt with a cloth to remove all the oils and grime. Make sure there are no cracks or crevices on the surface where water can hide.
Add washing soda: Sprinkle some washing soda over the wall’s surface. Work it into the dirt and grime with your hands until it’s mixed in evenly.
Soak it up: Wring out a cloth and let it sit on top of the washing soda for 10 minutes. It will help draw out any dirt, grease, or stains hidden beneath the surface.
Preventing future stains on the walls
Before painting your walls, be sure to clean them first. That will help to prevent any future stains. Here are some tips for cleaning wall surfaces:
-Wet a cloth or sponge and water, and wring it out. Use a wet cloth or sponge to scrub the wall’s surface gently. Make sure to get into all the crevices.
-Use a mild soap like Dawn or 409 if you need to go further. Soap will remove grease, wax, paint, and other detergents from the surface. Scrub thoroughly with a hard bristled brush in an up-and-down motion if needed. Rinse off with water until the suds are gone.
How To Paint An Accent Wall Like A Pro
There is no one “correct” way to paint an accent wall like a pro. However, following these simple tips can help you get great results every time.
- Decide What You Want To Accent
Before you start painting, take some time to decide what you want your accent wall to look like. That will help you choose the right colors and tones for your walls.
- Pick Your Colors Wisely
Once you have a general idea of what you want, it’s time to pick your colors. Again, use complementary colors that work together well, so your wall looks cohesive and harmonious.
- Prime And Seal The Wall If Necessary
If your wall is made of drywall, priming and sealing it is always a good idea before painting.
Removing stains from the walls
How to Remove Stains from the Walls: 8 Steps
If you find yourself with a stained wall, there are several basic steps you can take to remove the stain. Here are eight tips to get started:
- Test a small area first. If you only have a small stain, you may be able to remove it using just water and a cloth. However, if the area is still stained after applying this method, try using a household cleaner or ammonia.
- Preheat the area before cleaning. It’s important to preheat any surface you clean before beginning to kill bacteria and reduce the chances of further staining. For walls, this means warming up some water in a pot or bowl before spritzing it on the wall and wiping it off with a cloth.
Cleaning walls with a store-bought cleaner
Looking to clean your walls quickly and easily? Look no further than store-bought cleaners! Here are eight quick tips on how to clean walls with a store-bought cleaner.
The first step is to identify the surface you want to clean. If you don’t know, use a piece of paper or a dry cloth to test the surface to see if it’s dry enough. Next, find a cleaner that is made for walls. Many cleaners are specifically designed for this purpose and will not damage your paint or wallpaper. Once you have found the cleaner, pour some into a spray bottle and spray it onto the wall. Make sure to aim the spray at an angle so that it reaches all of the nooks and crannies. Finally, use a cloth or paper towel to wipe away any residue created by the cleaner.
Cleaning Walls With a DIY Cleaner
Are you weary of having to clean your walls every week? Do you wish there was a better way? Well, there is! You can clean your walls with a DIY cleaner! Following these simple steps can easily keep your walls looking their best.
Start by cleaning the surface of your wall where dirt and dust accumulate the most. Use a scrub brush and warm water to sweep the surface clean. Make sure to get into all the nooks and crannies.
Pour some DIY cleaner onto a cloth or sponge and apply it to the cleaned surface. Rub the cleaner into the dirt and dust until it has been removed. Be sure to work in a circular motion to avoid streaking.
Let the cleaner dry for a few minutes before wiping the entire wall with a fresh cloth or sponge.
Conclusion
Cleaning walls before painting is important to ensure a smooth and flawless finish. You can use a few different cleaners and techniques, so research which is the best for your situation. Finally, follow the manufacturer’s instructions for the specific cleaner you are using and the required prep time.


Commented Posts